Showing posts with label MFT. Show all posts

Friday, September 6, 2019

Glow in the Dark Night Scene with Heffy Doodle's Rescue Dog

Hi Crafty Friends!

Today, I created a night scene card with glow in the dark accents and the most adorable super dog ever!


I used Heffy Doodle's Rescue Dog stamp set and an MFT die with for the city silhouette and a Mama Elephant die for the frame.

This super simple card features an ink blended night sky with water drop details, nuvo glitter starts and nuvo glow drop details!

I copic colored the super dog and fussy cut him out so he wouldn't have a white border. I thought that would be jarring against the night sky.

Here is the process video on my channel if you'd like to watch this card come together. Delaney Jane Cards YouTube


All items were purchased with my own funds. This video / blog is not sponsored.

Confused about why I named it all Delaney Jane Cards if my name is Renee’?
This entire thing, shop, YouTube channel, blog, etc, it is all named after our angel daughter who passed away in 2013. I made her some promises when she passed away. I would spread joy, I would make her proud and I would speak her name daily. This is one way we choose to honor her memory, and help me keep my promises.

Speaking of blog, you can check it out at : www.delaneyjanecards.blogspot.com
Check out our online store at: www.delaneyjanecards.com
Want to visit us on Instagram? Check us out at @delaneyjanecards


Wednesday, June 19, 2019

Coloring without coloring on Day 5

What a neat concept, to color without actually coloring. My Favorite Things makes this set called abstract art, many companies make similar sets which consist of scribbles, paint brush swipes, spots, dots and splatters.

I stamped the image, Simon Says Stamp's beautiful flowers across two card panels of Strathmore Bristol Smooth cardstock. And I heat embossed it with ultra fine gold embossing powder.

I die cut the panel out with a Mama Elephant stitched rectangle from the Basic Set Dies. Then I simply stamped the large scribble from the MFT stamp set over the image, twisted citron for the leaves and spun sugar for the flowers.

The sentiment was heat embossed in the same gold embossing powder and it is from a Pretty Pink Posh stamp set called simple sayings Courage. I felt like the line style matched this stamped image so well.


I layered it on a piece of Tonic Gold Pearl Satin finish cardstock. I then mounted the matted panel to a piece of Bazzill Guava Sensation cardstock, which is an excellent match to the spun sugar distress oxide, and then onto another piece of the gold pearl cardstock.

I know I used a lot of products to make what seems like a super simple card, but I think it turned out really pretty and in just a few minutes I had a very beautiful card, in my opinion.


That completed day 5 of the coloring challenge for me.


Sunday, June 16, 2019

Day 2 and a Ship in a Bottle

 Today was day 2 of the 30 day challenge from The Daily Marker.


I chose to use this adorable ship in a bottle image from Pink and Main to create this card. I colored the image with Copic markers, my coloring medium of choice.

The layers are created with the patterned paper in the Shore 6x6 paper pad that also came in the card kit.

I fussy cut the image and added glossy accents to the portholes.


A Simon Says Stamp stitched banner die was used for the sentiment which I heat embossed in Navy Embossing Powder from Ranger.


Wednesday, July 5, 2017

Fill in the Blank Birthday


This set by Catherine Pooler Designs is simply AMAZING! It allows me to personalize a card for basically anyone. With words like Teacher, friend, Sister, Aunt, Husband, Best, Step, In-law etc... I can create a card for basically anyone I come into contact with.


And this paper pad by American Crafts seems to be one of my more favorite paper pads recently. I like the worn texture in the prints and the color scheme is really calming. I ordered it from Simon Says Stamp a while back and as of writing this blog, it is available so here is a link: SSS AC Shimelle
(no, this isn't an affiliate link just a link to the product)

Ok, so back to the card making. I did a little stamp surgery on this fill in the blanks set and cut off the bottom flourish. The stamp would not fit inside my die cut square with it on there and if I want to use it the way the stamp was intended in the future, it is as easy as lining it back up on my stamping block or in my MISTI.

I stamped the sentiment panel using Versafine Onyx Black Ink onto Primitive White Cardstock from MFT after I die cut it with the largest of the MFT cross stitched squares, then I embossed the sentiment with clear embossing powder from Ranger.


I cut some SSS dark grey cardstock into squares just 1/8" larger than the square die. I probably could have used black but I felt the dark grey fit better with the worn look of the colors in this paper pad.

Then I die cut the main card front panel using the large stitched rectangle from SSS stitched shapes bundle dies and the black and white striped paper with the MFT Blueprints 1 Die-namics stitched border strip die.  And finally a little banner with the SSS stitched shapes from the same dark grey I used to layer the main panel on.

Three silver brads from Recollections finished the card front off before I adhered it to a top folding Primitive White Cardstock Card Base.

The inside of the card is finished with a strip of the same black and white striped paper.

I created a second card while I had the products out.


I'm pretty sure I love the graphic look and the simple design these cards have.  I plan to create several more using this set and layout for an upcoming event.

Stay tuned for a huge announcement regarding Because of Delaney Jane Cards.

Monday, July 3, 2017

Holly Hobby


My mom has been subscribed to Cardmaking magazine for at least 8 years or so, since she was up late one night and purchased the first Cricut machine from HSN for me and the 1 year was included. Since then, she has continued to receive it but doesn't do more than flip through the magazine and then pass it along to me. Each month it comes with a free gift and once, in maybe 2013, it came with a Holly Hobby stamp set. I wanted to start digging into my stash and use what I have because not everyone is able to purchase the newest things each month and I wanted to show how strong a "stash" card could be.

I pulled out a very old 6x6 paper pad from Simple Stories as well and decided to create the card based on the colors and textures of the papers in the pad. I've had this paper pad for several years, probably close to 6 and I did locate it online but it is retired. I'm sure cute paper packs similar are on the market.

This pad was always a challenge for me. I used up the most of the sheets of single pattern paper and what was left were these sheets made up of little squares and rectangle pieces I'm sure were meant to be cut apart and used in a scrapbook of some sort. There were two larger pieces with single patterns left and I used them both in this card, the Chevron and the Yellow with white polka dots.


I paper pieced the kite and the girl's hat using some of the smaller pieces in the pack. And I colored the image with my Copic markers. (E00, E39, R24, R27, YG17, YG25, YG45, B000, B00, B41, B93, B97 & 0 Colorless Blender) I also edged the paper pieced pieces with my Tombow dark grey marker.

Dies used to create this card were MFT Die-namics Blueprints 2 large rectangle, MFT Die-namics Pierced Rectangles second to largest rectangle, un-named circle die.


I didn't add any dimension to this card because I wanted it flat for mailing and I thought the layers added enough interest. The inside was finished with a white cardstock panel and a strip of the yellow with white polka dot paper.

I'd love to know what you think of my card.


Friday, June 30, 2017

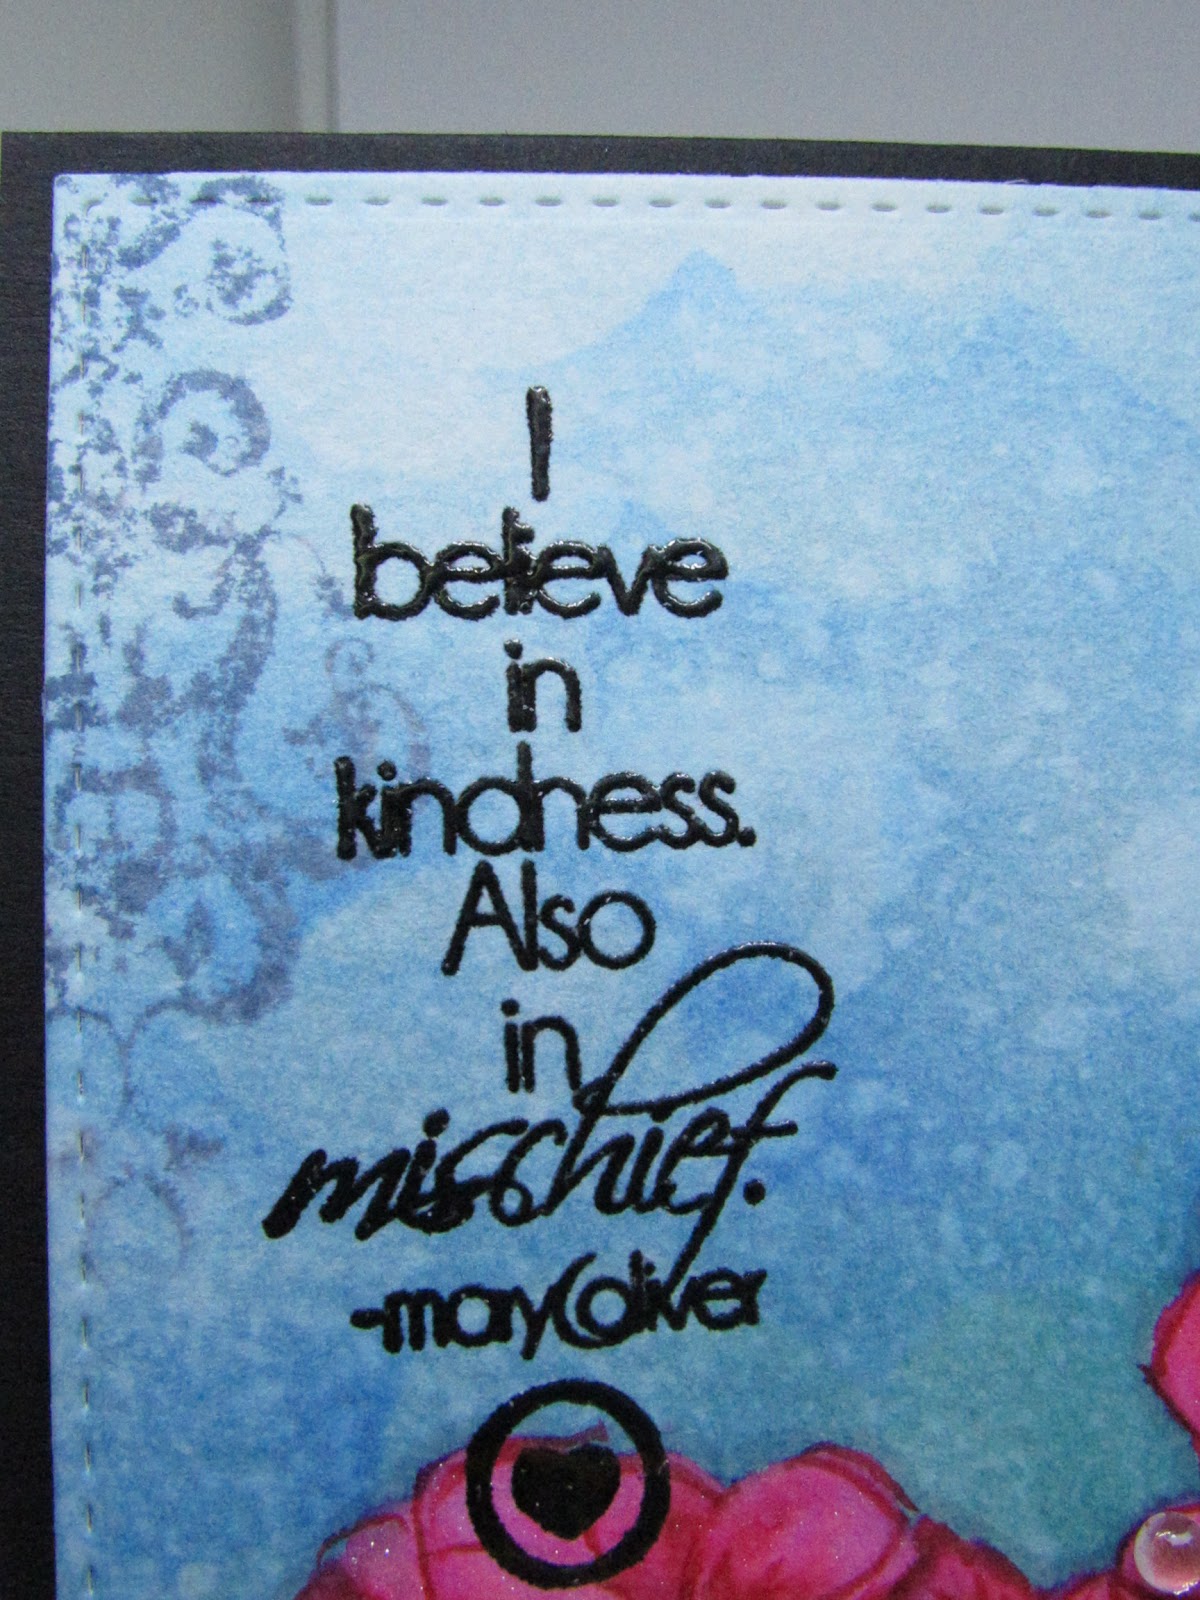
Quoting Mary Oliver


I played in the craft room today, again. And I liked what I created. This bright card was not what I intended on creating but once I started stamping and painting it sort of created itself. All the stamps I used are Unity stamps and I only used a single die from Simon Says Stamp.

I started by stamping my flowers in MFT Hybrid Ink, in the color natural. I was watching some YouTubers take a similar ink from SSS and create faux no line water coloring with it and I thought maybe I'd get a similar look with this. The answer... sort of a no... but I wanted to make this card work so I did a few things to help it along.

My images are stamped on Strathmore Ready Cut Watercolor paper. I masked my images and blended the background with a combination of several blue distress inks, broken china, mermaid lagoon and peacock feathers. Then I used a hand-cut stencil to sort of sponge in some cloud like shapes in the background. While the masks were in place I stamped the ornate shape in the background with stormy sky distress ink. Then I started to watercolor the images.


I used my Zig clean color real brush markers because, let's face it, I need serious practice with these markers. I used Carmine Red No 022 and Wine Red No 024 for the flowers. Just putting a little bit on the petals and pulling the color out with my water brush. I used Deep Green No. 044 for the stems. Once I had the base color to all the flowers down, I used my Distress sprayer to spritz the entire panel and get some cool distressed droplets.

After that, I went in with the Carmine Red Zig marker and added the outlines back into the flowers using a real light pressure, barely touching the paper. I wanted even more depth so I did use a few Copic Markers C1 & C3 to help create a little bit of a shadow so the flowers popped off the panel a bit more. This is very subtle but does help.

I die cut the panel with a Simon Says Stamp Stitched Shapes Bundle die for some additional interest.


I stamped the sentiment with my MISTI in Versafine Onyx Black ink and heat embossed it with Ranger Clear embossing powder. Then I sparkled it all up. I used the Wink of Stella on the flower petals that would be further back and in the shaded areas and I used the Spectrum Noir Clear Glitter Brush Pen on the areas where it would be out front. In real life, this card is so sparkly!

I added a few droplets from Pretty Pink Posh using my Ranger Multi Medium Matte. I lined the inside with a white panel because my card base is the black cardstock from MFT and that completed my card.


Monday, June 26, 2017

You Color My World


The current color throwdown had me scratching my head for a few days. Although, I love the color combination, it left me with no ideas, NONE!


 (  for details on the color throwdown, click here: ctd448  )

And then I found this one piece of patterned paper in my Pink Paisley  Take Me Away 6x6 paper pad and I was absolutely inspired.

I wanted to use this specific piece of paper in a unique way that would really highlight just how beautiful it is. I also wanted to get some use out of this globe die I received from one of those "from China" applications on my phone a while back.


What I did was die cut the globe from an area of the paper that highlighted most of the colors in the throwdown, mint, pink and purple. I then die cut the stitched rectangle from the same piece making sure to center the space the globe die cut left.


I cut a teal circle from some MFT cardstock using an Amuse Studio stitched circle die and then I die cut the globe from two more pieces, this time of a light lavender cardstock also from MFT.

I layered the teal circle and then the two lavender globes, topped with the patterned paper globe to create a beautifully dimensional globe embellishment. I then clear Wink of Stella'd the continents for some shimmer.

As you can see, the purple adds a bit of interest to the edge of the die cut globe.


My card base is some mint cardstock from MFT. To attach the card panel I layered the patterned paper onto the black cardstock then inserted the cool globe image. I had die cut a piece of the mint colored cardstock from a Blueprints die and the word Color from the same teal color I used to back the globe. I stamped my sentiment using Versafine Onyx Black ink and glued the die cut word where it fit. I popped up the sentiment strip with some foam tape around where it would touch the globe and used Ranger Multi Medium Matte to adhere it where the banner touched the globe.

I finished the card with a few sequins from Lucy's Cards Pastel Paradise Mix because they matched the colors and the softness of this card really well. I left the inside blank for a message.

I'd love to know what you think of my card.


Friday, June 16, 2017

The World is Yours


I played along with The Color Throwdown ctd447 this week and look at this cool color combo!


I love how the pale colors have the contrast of the navy and the bright green. A summer combo, for sure.


I used Unity's World Is Yours set by Joslyn Nielsen & Lisa Arana. I've always had a thing for globes and this set was right up my alley! 
You can find it here:  World Is Yours (I have no affiliation with Unity Stamp Co, except that I really like their stamps) 
When I went to their site to grab the link it notified me that a surprise percent off sale is happening right now, so if this set is your style too, today might be the day you want to jump, just sayin'.


I left this card very flat except the tales of the banner are curled up and I added a few sequins to further the color combination theme. The lighter aqua and green are from SSS's meadow mix and the darker aqua are from Neat & Tangled's Ocean waves mix.

Patterned papers for this card are from MFT's Birthday Blowout 6x6 (the green stripe)
and Crate Paper's Cool Kid (the kraft print and the aqua and dark blue print)

The dark blue cardstock is from MFT.

I colored the image with a few Copic markers to match the color theme.

Thanks for stopping by. I'd love it if you left me a comment below. ;)

Wednesday, June 14, 2017

Thank You. Really.


Sometimes in life we are humbled by our circumstances and those that step in and help when they could have really looked the other way.

My friend, I've never met, from across the country sent some birthday things for Cooper. I couldn't provide these things but she found a way to do just that.

You see, I've built a friendship with her over the last almost 6 years based on a common experience and well, she is as amazing today as she was 6 years ago.

So this card was created as a way to say thank you for all you have done Becky.


Monday, June 12, 2017

I'm so Grateful


The past few weeks we've been dealing with an incredible hardship and one of the ladies from our church stepped up and helped us provide something very special for our  young son.

On top of her kindness in regards to him, she opened her heart to me and shared some of her personal story. This was the first time in the 3 years we've been attending this church that I've felt included, a part, important, & wanted. While true I've never felt like a burden to the church, I've often left after Sunday service feeling less than wanted and more like an outsider than ever before.

I've not shared that with anyone until recently.

This woman was so kind and compassionate and can relate to me and my story in so many ways and she did something incredibly kind and compassionate and all I could do was make a card. That is what I have to offer, a simple piece of paper. But you know what? I'm guessing that because she knew it was all I had to offer, it meant something to her too.


For today's card I used MFT cardstock and stamps along with Bo Bunny designer paper.  I also used a very pretty embossing folder to add some much needed texture to the main panel.

This post isn't so much about the card though, it is more about the reason for it. Thank you Jolene, thank you so much.


Monday, June 5, 2017

You're Rawr-some


Oh MFT, you did it again! This dinosaur stamp set is so adorable and paired with this patterned paper from the Cool Kid 6x6 pad from Crate Paper created a most adorable card.

A stitched circle die from A Muse Studio for the main panel, The grass border die from Avery Elle to create the grassy border. Stitched banner from MFT for the sentiment strip and the clouds are a combo of Avery Elle and dies directly from China. The main panel is a stitched rectangle from Simon Says Stamp.

I used distress inks for the grass and the Altenew inks for the sky.  Copics for coloring the images. I took my colors directly from this patterned paper too! I did pop up the dinosaur and the banner sentiment with a little foam tape for added dimension.

 I finished the inside with an additional dinosaur and the leftover die cuts from the front. And I made the dinosaur stand on the remaining sentiment. Cute? Or... Rawr-some maybe?


Monday, May 15, 2017

Happy Birthday To You


A seriously quick but cool card for today. I used two dies to create the entire card, a little bit of patterned paper, 3/4 of a sheet of card stock, some foam mounting tape, a piece of acetate and a pinch or two of two different sequin and seed bead mixes. Now that I type that out, maybe the list of supplies seems a little bigger than I originally thought.


I was aiming for masculine but I guess by adding sequins in the shaker it makes it sparkle a little much for some guys. 

I used the MFT Happy Birthday To You die and the A Muse Studio Tag Bundle pinked edge rectangle die. A piece of MFT paper backs the main panel. 3M foam tape bundled up around the edges of the words create a pocket for the sequins and seed beads. Acetate keeps all of it from falling out the holes where the words are (because that would suck!) 

I replaced the letters without adhesive to use as place holders while I put the centers of the letters back in using liquid adhesive. Like on the O and B... etc... 

I think it turned out fun. Thoughts?

Saturday, May 13, 2017

Out of this World

So Friday's blog has become Saturday's blog because... well... I've got a needy infant and my glossy accents took forever to dry. That's my story and I'm sticking to it. ;)


I created something I've never created before, a card with two interactive elements on it. You can see those almost complete circle channels cut into the card front, those allow both the space ship and the astronaut to "float" around in space. Sort of neat, right?

This card was created for our very favorite nurse at our Pediatrician's office. She will be leaving pediatrics and taking a position in oncology. She will be missed tremendously.

I figured this was a cute way to send her off to her future from my boys to her.


She has small kids so I thought something interactive would be super neat. I bet they want to play with this when their mom shows them. I know Cooper would be all over it if I'd let him!


I used the Lawn Fawn Out of this World set and stamped and colored the images with Copic markers. Then I die cut them with the matching dies. ( I wish the rocket flame would have a die, but I had to fussy cut that part) Then I chose this adorable star paper from Avery Elle, the Everyday Collection.

I used a bit of washi tape to stick the circle channel dies to the front panel and ran it through my big shot die cutting machine and kept the pieces it cut out. I temporarily adhered my panel to the card front with a little bit of washi tape and then adhered the inside of the circle channel pieces with some liquid adhesive and removed the main panel while that dried.

I applied a generous amount of foam tape to the back of the main background panel, making sure to leave an area around each of the channel so the pieces I wanted to slide had plenty of room.

MFT released several of these channel dies to make interactive cards over the last few years and they also have some little slider pieces. One set is round and the other look like a flat tic-tac. I used the oval tic-tac shaped ones for this because I wanted my elements to slide and not spin.

Some glossy accents on the astronaut's helmet and the ship's window and a heat embossed sentiment completed the card front.


I wanted the inside to be just as cute and coordinate, so I used another sentiment from the set and stamped the stars. Then I adhered an extra planet I had colored and die cut.  I really hope she likes her card.

Tuesday, May 9, 2017

Sketched Mother's Day

I pulled out one of my new favorite stamp sets to make a Mother's Day card and sample for the 4H kids project for the week.


I used the sketched ranunculus set and heat embossed the flowers and leaves onto some Bristol Smooth Cardstock. I used Versafine onyx black ink and clear embossing powder. You still get the crisp black embossing but not the stray black powder bits black embossing powder can sometimes leave.

Then I used my Zig clean color real brush markers and added a little color to each image and pulling it out with my water brush. I only used one shade of red and one shade of green for each image. I really like the variation in color you get by pulling it out with the water. I set that aside to dry and then die cut a panel of bristol card stock with this rectangle die from the Simon Says Stamp Stitched Shapes set.

 I used the MFT hybrid ink in a neutral shade to stamp a Stampabilities medallion onto the corner of the panel. I wanted this to be very subtle. With a little distress ink and a blending pad I blended in some blue from the corner.

I heat embossed a sentiment from Avery Elle in Antique Gold Embossing Powder from Simon Says Stamp and then fussy cut the images out. These were simple shapes so they were easy and took no time at all. I used some foam tape to pop up the main flower and then adhered the remaining flowers flat using Tombo Mono Multi adhesive. Once the flowers were placed I added my leaves.

I mounted the panel on a piece of black cardstock and that finished my card.


Monday, April 17, 2017

How to make me Happy:


I've had this Simon Says Stamp set for a while now called Choose Happy and I'd yet to ink any of the stamps up. Once I got this True Stories paper pad by American Crafts in the mail I knew I had to make a coffee themed card and I had to do it right away!


 It really came together pretty quickly once I decided on a sketch to work off of for the card. I made the sketch my own instead of following it directly, but I loved the results.

Using the MFT Pierced Rectangle dies, I die cut two pieces patterned paper panels and then with a smaller Pierced Rectangle I die cut a white panel from some MFT Smooth White Cardstock.

The largest patterned paper was cut using the MFT Blueprints 2 Large Rectangle die.

After my papers were cut this card came together in a matter of minutes.


I stamped the focal panel with this adorable sentiment and coffee cup image, quick colored the cup and heart and coffee with some Copic markers (W00, R24, E57), added a little glossy accents and a few Stampin' Up enamel dots to finish the card front.

I attached it to a 4 1/4 x 5 1/2" MFT Blueberry Cardstock panel and attached to an A2 top fold card base.

I stamped one more sentiment on the inside with the same coffee cup image. I used the same three Copic markers to color it quickly and the card was complete.