Friday, June 30, 2017

Quoting Mary Oliver


I played in the craft room today, again. And I liked what I created. This bright card was not what I intended on creating but once I started stamping and painting it sort of created itself. All the stamps I used are Unity stamps and I only used a single die from Simon Says Stamp.

I started by stamping my flowers in MFT Hybrid Ink, in the color natural. I was watching some YouTubers take a similar ink from SSS and create faux no line water coloring with it and I thought maybe I'd get a similar look with this. The answer... sort of a no... but I wanted to make this card work so I did a few things to help it along.

My images are stamped on Strathmore Ready Cut Watercolor paper. I masked my images and blended the background with a combination of several blue distress inks, broken china, mermaid lagoon and peacock feathers. Then I used a hand-cut stencil to sort of sponge in some cloud like shapes in the background. While the masks were in place I stamped the ornate shape in the background with stormy sky distress ink. Then I started to watercolor the images.


I used my Zig clean color real brush markers because, let's face it, I need serious practice with these markers. I used Carmine Red No 022 and Wine Red No 024 for the flowers. Just putting a little bit on the petals and pulling the color out with my water brush. I used Deep Green No. 044 for the stems. Once I had the base color to all the flowers down, I used my Distress sprayer to spritz the entire panel and get some cool distressed droplets.

After that, I went in with the Carmine Red Zig marker and added the outlines back into the flowers using a real light pressure, barely touching the paper. I wanted even more depth so I did use a few Copic Markers C1 & C3 to help create a little bit of a shadow so the flowers popped off the panel a bit more. This is very subtle but does help.

I die cut the panel with a Simon Says Stamp Stitched Shapes Bundle die for some additional interest.


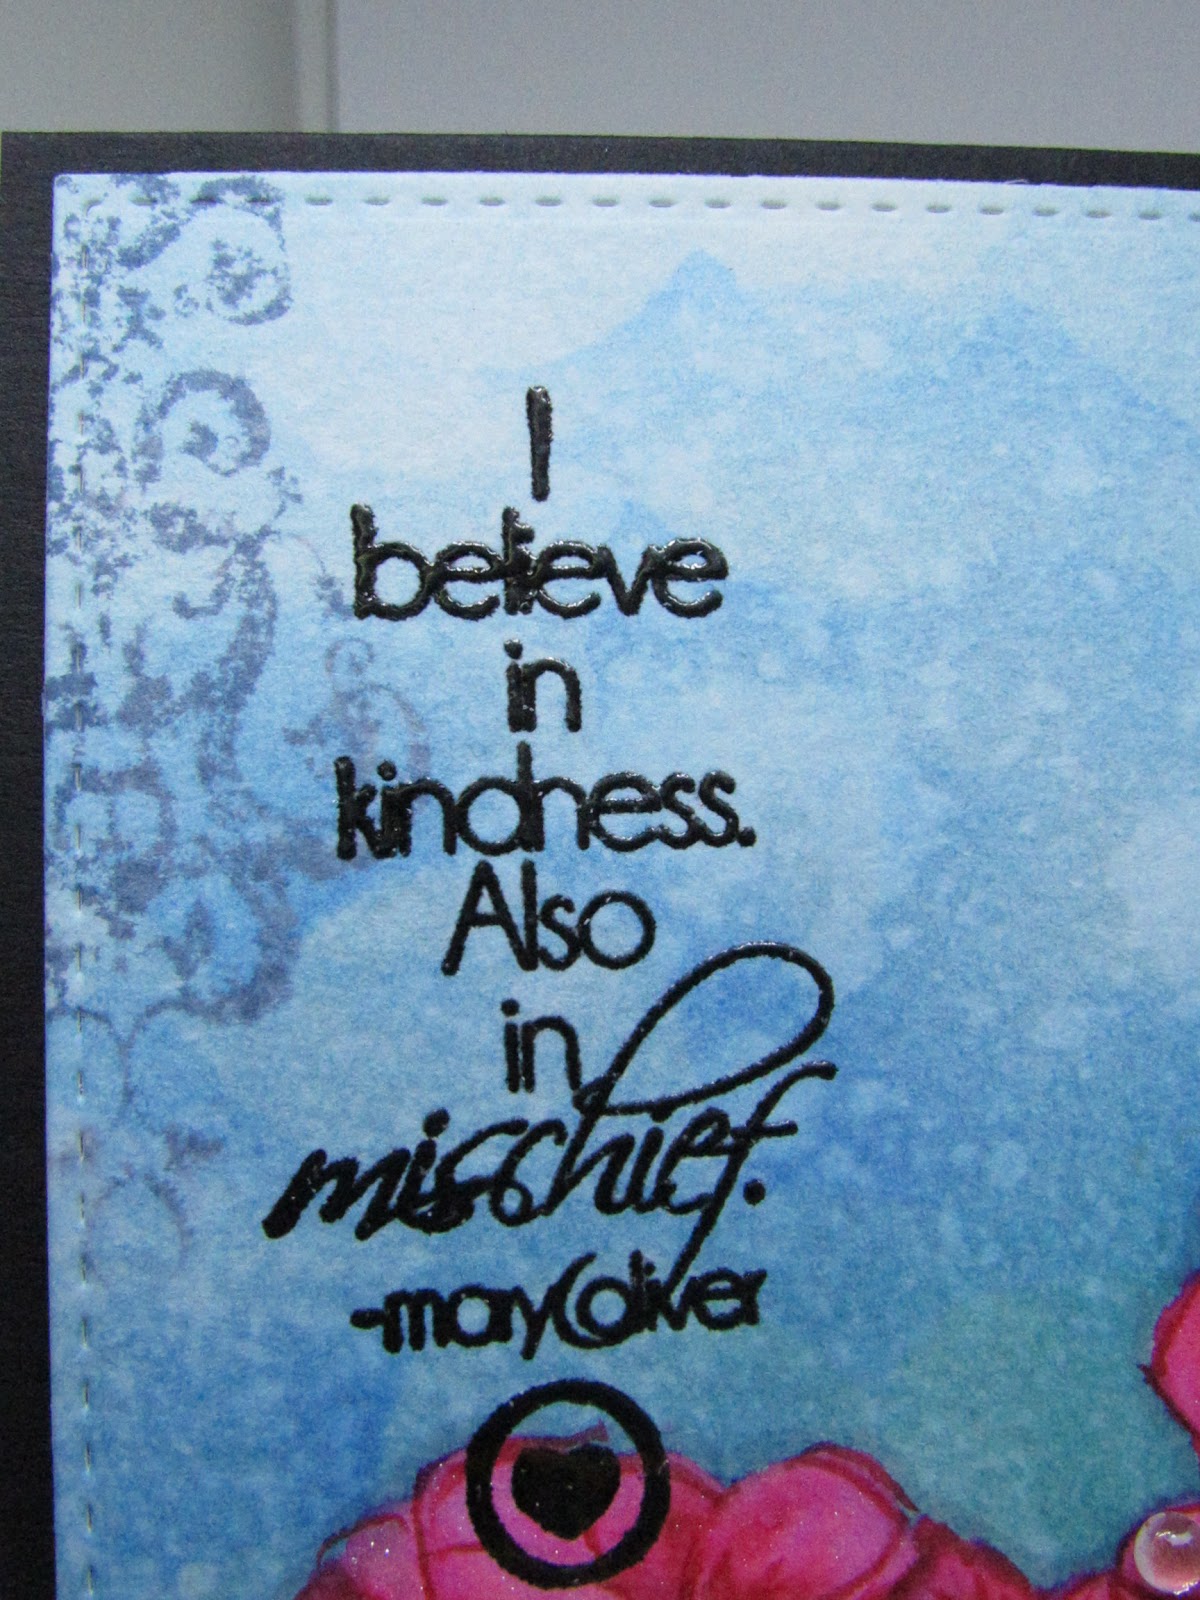
I stamped the sentiment with my MISTI in Versafine Onyx Black ink and heat embossed it with Ranger Clear embossing powder. Then I sparkled it all up. I used the Wink of Stella on the flower petals that would be further back and in the shaded areas and I used the Spectrum Noir Clear Glitter Brush Pen on the areas where it would be out front. In real life, this card is so sparkly!

I added a few droplets from Pretty Pink Posh using my Ranger Multi Medium Matte. I lined the inside with a white panel because my card base is the black cardstock from MFT and that completed my card.


Thursday, June 29, 2017

You know you're old when...


This week's color throwdown was a combo of orange, brown and green and when I saw them I immediately thought of this old man. Info on the color throwdown for this week can be found here:  (CTD449)


I've had this set since it was released in 2007! It was one of my first Gina K stamp sets (from before Gina K was so popular) and I love how Pun-ny and awesome this set is. (there is even a piece of washi tape stuck to it that I cannot remove because it has been there so long)


This old man screams, paper piece me so I held up my end of the bargain with some just-as-old paper from We R Memory Keepers.


I used the last three pieces I had in the pad to create this card.


I added a piece of Brown cardstock and a piece of orange card stock to solidify the color combination. I also used a brown corduroy button brad from SU a friend sent me a while back.

The inside of the card is finished with a white card panel and the remainder of the sentiment.


I'd love to know what you think of my card for today.

Wednesday, June 28, 2017

Keep Your Head Up


Have you ever created a card more for yourself than anyone else? Honestly, who makes a card to basically send to themselves, THIS GIRL!

I've been struggling really hard with some super deep emotional demons lately and I needed a pick-me-up. Crafting has always been my happy place but sometimes I just get lost in my emotions and the noise in my head and I can't make heads or tails out when it comes to creating something.

I knew I needed a direction or a jumping point and a card sketch always comes to the rescue, for me.

I found this sketch by getting lost in Blog-land. I viewed my blog post from Sunday and then clicked on the next blog and found a link to another blog and then another and another and finally I rested on The Paper Players and low and behold, they had a challenge going on with a sketch. Their challenge is a bit different than just a sketch challenge, they also challenge participants to use tone on tone stamping so I thought I'd focus my energy on trying this out.  (To check out the blog I'm referring to, please click here: The Paper Players)


To create the card I do something I'm not sure anyone else does, but I always sketch out the measurements on my SSS grid paper and pull dies out to fulfill the requirements and then place my stamps I'm hoping to use. It makes creating a card much quicker for me.


Then I either pull papers from my designer 6x6 pads and my 8 1/2 x 11 cardstock or pick my stamp set(s). Today I picked the background stamp first, then the papers and finally the image and sentiments I wanted to use.


I wanted to do this cool tone on tone stamping but I really didn't have any light blue inks and the SSS clear ink wasn't giving me the look I wanted, so I chose to heat emboss the chevron patterns with clear embossing powder by Ranger. The chevron pattern is a stamp in the GEOBuilders set by Stamp of Approval by Catherine Pooler Designs.

I adhered the strip of patterned paper to the background panel and then I did all my die cutting. I wanted the background panel to have a seamless look because of the stitched border. I had to run it through my machine twice to get a really clean cut with the die, but I think the extra revolutions of the handle of the Big Shot were really worth it. Patterned paper was from GCD Studios Pure Bliss 6x6 paper pad.

Then I die cut all the pieces I needed to create this card and even trimmed the black layer and folded a card base so all my pieces were ready to go. Dies used: A Muse Studio stitched circles, SSS Stitched Shapes, SSS Stitched Banners, un-named circle die.

The SSS stitched banner I used for the sentiment is much longer when originally cut but the SSS stitched shapes dies offers a straight stitched die I used to make sure the stitching was consistent and cut it at the length I needed.  My sentiment was stamped using Versafine Onyx Black Ink and comes from Create A Smile Bad Day stamp set.

I stamped the main image onto the vanilla A Muse Studio cardstock using SSS Intense Black Ink and colored it with a few Blue Copic markers to coordinate with the color theme, (B000, B00, & B01). The image stamp comes from the Create A Smile Bad Day stamp set.


I finished the inside of the card with an additional sentiment and two layers created from leftover cardstock and patterned paper, die cut with the SSS Stitched Shapes dies.

I'm pretty sure I forgot to mention the enamel dots came from Richard Garay's line of matte finish dots. I think they contrast with the gloss of the clear embossing to add another layer of dimension and texture fairly nicely.

I'd love to know your thoughts on my card, my process, the products used or even if you create cards for yourself, like I did today.


Monday, June 26, 2017

You Color My World


The current color throwdown had me scratching my head for a few days. Although, I love the color combination, it left me with no ideas, NONE!


 (  for details on the color throwdown, click here: ctd448  )

And then I found this one piece of patterned paper in my Pink Paisley  Take Me Away 6x6 paper pad and I was absolutely inspired.

I wanted to use this specific piece of paper in a unique way that would really highlight just how beautiful it is. I also wanted to get some use out of this globe die I received from one of those "from China" applications on my phone a while back.


What I did was die cut the globe from an area of the paper that highlighted most of the colors in the throwdown, mint, pink and purple. I then die cut the stitched rectangle from the same piece making sure to center the space the globe die cut left.


I cut a teal circle from some MFT cardstock using an Amuse Studio stitched circle die and then I die cut the globe from two more pieces, this time of a light lavender cardstock also from MFT.

I layered the teal circle and then the two lavender globes, topped with the patterned paper globe to create a beautifully dimensional globe embellishment. I then clear Wink of Stella'd the continents for some shimmer.

As you can see, the purple adds a bit of interest to the edge of the die cut globe.


My card base is some mint cardstock from MFT. To attach the card panel I layered the patterned paper onto the black cardstock then inserted the cool globe image. I had die cut a piece of the mint colored cardstock from a Blueprints die and the word Color from the same teal color I used to back the globe. I stamped my sentiment using Versafine Onyx Black ink and glued the die cut word where it fit. I popped up the sentiment strip with some foam tape around where it would touch the globe and used Ranger Multi Medium Matte to adhere it where the banner touched the globe.

I finished the card with a few sequins from Lucy's Cards Pastel Paradise Mix because they matched the colors and the softness of this card really well. I left the inside blank for a message.

I'd love to know what you think of my card.


Sunday, June 25, 2017

Thanks A Latte!


I cannot be the only one who gets all giddy when someone asks you to play along with their blog hop or challenge? I mean, as a card maker I get so proud when someone wants me to make something for their thing, blog, challenge, whatever. (psst, it is called a monthly collaboration Renee')

My wonderful and talented friend Deb asked me to participate in her and her friend Celeste's monthly challenge blog hop post thing  (again, monthly collaboration) and I thought I'd give it a go.

This little hedgie has wanted ink from the day he arrived. I swear to you, he has been  yelling at me in his cutest hedgie voice, please choose me today. ;)

So Deb is a little obsessed with paper crafting and coffee  (and washi tape)...

My card was created in her honor.

I used Gerta Steiner Designs for the little Hedgie and all the stamps on today's card.
The paper was from American Crafts Shimelle true stories 6x6 paper pad and it was also the very last piece from a super old 6x6 I had from DCWV called Spring Mix. <---also a reason to squeel, I rarely use the last piece of a paper pad.
The washi is some clear washi with white printing from one of those apps on the phone where everything is a dollar.

So, now that we know what I used and why I made this card, let's talk about how it was created.


Although this hedgie image is more winter themed and I was informed this blog hop, post, monthly challenge thing is about summer and coffee, I figured I could liven him up with a bright summery scarf and it could work.

I paper pieced the entire image. The scarf and the cup cozy were cut from the patterned papers used and the hedgie was fussy cut out of some Neenah after I colored him with a few Copic Markers (E31, E35 & E93 to be exact) The cup was shaded with Copic C2.

I wanted to highlight this adorable coffee themed patterned paper from AC and thought this wonky banner formation would work best to anchor my main image without taking away from the paper.

The washi tape on this card, only added because of Deb. I'm not a washi tape person. I use it to mainly hold my dies down while feeding it through my die cut machine (hence the reason I pick up the 5 rolls for $1 deals). But, I thought this card needed a bit more something so I put a piece on.

I also decided to stamp my sentiment directly on the patterned paper but I wanted it to be highlighted in some way, so I lead to it with a trail of hearts. It sort of works, right? (hearts colored with Copic R24)

Let me know what you think below of this hedgie and his coffee loving ways.


Before I forget, the inside is finished with a white card liner and a fussy cut coffee cup from the patterned paper. Leaving lots of room for a thankful message.

I'd insert a picture of coffee here ___________ like she always does, but I'm not the biggest fan of coffee... I know, GASP! right!!! But I don't mind if my friends like coffee. ;)

To view the other cards in this collaboration please stop by the blogs listed below:

Meticulosity - Deb
Crafting Junky- Celeste

Please stop by and read my bio to see why my blog is called Because of Delaney Jane. 

Friday, June 16, 2017

The World is Yours


I played along with The Color Throwdown ctd447 this week and look at this cool color combo!


I love how the pale colors have the contrast of the navy and the bright green. A summer combo, for sure.


I used Unity's World Is Yours set by Joslyn Nielsen & Lisa Arana. I've always had a thing for globes and this set was right up my alley! 
You can find it here:  World Is Yours (I have no affiliation with Unity Stamp Co, except that I really like their stamps) 
When I went to their site to grab the link it notified me that a surprise percent off sale is happening right now, so if this set is your style too, today might be the day you want to jump, just sayin'.


I left this card very flat except the tales of the banner are curled up and I added a few sequins to further the color combination theme. The lighter aqua and green are from SSS's meadow mix and the darker aqua are from Neat & Tangled's Ocean waves mix.

Patterned papers for this card are from MFT's Birthday Blowout 6x6 (the green stripe)
and Crate Paper's Cool Kid (the kraft print and the aqua and dark blue print)

The dark blue cardstock is from MFT.

I colored the image with a few Copic markers to match the color theme.

Thanks for stopping by. I'd love it if you left me a comment below. ;)

Wednesday, June 14, 2017

Thank You. Really.


Sometimes in life we are humbled by our circumstances and those that step in and help when they could have really looked the other way.

My friend, I've never met, from across the country sent some birthday things for Cooper. I couldn't provide these things but she found a way to do just that.

You see, I've built a friendship with her over the last almost 6 years based on a common experience and well, she is as amazing today as she was 6 years ago.

So this card was created as a way to say thank you for all you have done Becky.


Monday, June 12, 2017

I'm so Grateful


The past few weeks we've been dealing with an incredible hardship and one of the ladies from our church stepped up and helped us provide something very special for our  young son.

On top of her kindness in regards to him, she opened her heart to me and shared some of her personal story. This was the first time in the 3 years we've been attending this church that I've felt included, a part, important, & wanted. While true I've never felt like a burden to the church, I've often left after Sunday service feeling less than wanted and more like an outsider than ever before.

I've not shared that with anyone until recently.

This woman was so kind and compassionate and can relate to me and my story in so many ways and she did something incredibly kind and compassionate and all I could do was make a card. That is what I have to offer, a simple piece of paper. But you know what? I'm guessing that because she knew it was all I had to offer, it meant something to her too.


For today's card I used MFT cardstock and stamps along with Bo Bunny designer paper.  I also used a very pretty embossing folder to add some much needed texture to the main panel.

This post isn't so much about the card though, it is more about the reason for it. Thank you Jolene, thank you so much.


Friday, June 9, 2017

Hog wild?!?


I picked up this pig stamp set from one of those shopping apps where everything is super cheap and takes forever to arrive. But it was totally worth it for these adorable images. There were maybe 7 or so images in the set but these three seemed like they could pull off some party hats and help a little boy celebrate in a hog wild sort of way...


I wanted them to be more birthday themed so I used this old set from A Muse studio Go Hog Wild, for the party hats, balloon and the grass tufts and flowers. I also pulled the sentiments from the set as well. 

A little masking helped me get those party hats in the right spots on those adorable pigs.

I used a die from Avery Elle to create the grassy border. I wanted it to appear there were rolling meadows for these critters so once I die cut the grass, I masked and sponged in an additional hill behind for the pigs to be on and it created additional depth. 

The grass was sponged with distress inks, twisted citron and mowed lawn. The balloon was a complete afterthought. once I had the card almost 100% complete I thought that pig needed something to hold. And the A Muse set had this balloon in it. It is a solid image stamp so you use colored ink to stamp it. The style wasn't the same as the stamped pigs so I used colored ink to stamp the balloon and then outlined the balloon to create a more cohesive look. This gave that pig a reason to be looking all crazy too... I added glossy accents to the balloon, pigs' eyes and to the one pig's teeth. 


As I almost always do, I finished the inside of the card with a sentiment.


I also stamped a smaller pig image and colored it to match the main images. 

I hope the little boy receiving this card thinks it is as fun as I do. 


Wednesday, June 7, 2017

Hope your birthday is...

Out of this world!


This adorable Lawn Fawn set helped me create a single layer card for a very special boy's birthday. He has issues with texture and having layers of paper on his card could have potentially sent him into a meltdown. So I created a single layer space background using some masking paper and fluid.

This was the first time I'd used the masking fluid so I wasn't sure what to expect. The star images were a little small to fill in properly so they aren't perfect but... what stars are?

I stamped the images onto Smooth White Cardstock from MFT in Lawn Fawn Jet black ink. Then I used paper masks for the large images and molotow masking fluid for the stars and I let that dry completely. Then I blended on some bright colors using Tim Holz mini blending tools and went over the entire thing with the black soot distress ink to create the background. I splattered on some shimmer spray, used a paper towel to blot some of that up and then used the tube of the spray bottle to put some larger droplets onto the background and let them dry. I used an eraser to rub away the masking fluid from the stars and colored all the images with Copic markers. I added some gelly roll pen dots in white to the background and used it to add detail to the colored images. I also went over the stamped sentiment. Since texture can be a huge thing for him, I didn't want to heat emboss but I also didn't want to lose the sentiment among the darkness of the background.


The inside has the remaining sentiment and a few starts stamped. 


Monday, June 5, 2017

You're Rawr-some


Oh MFT, you did it again! This dinosaur stamp set is so adorable and paired with this patterned paper from the Cool Kid 6x6 pad from Crate Paper created a most adorable card.

A stitched circle die from A Muse Studio for the main panel, The grass border die from Avery Elle to create the grassy border. Stitched banner from MFT for the sentiment strip and the clouds are a combo of Avery Elle and dies directly from China. The main panel is a stitched rectangle from Simon Says Stamp.

I used distress inks for the grass and the Altenew inks for the sky.  Copics for coloring the images. I took my colors directly from this patterned paper too! I did pop up the dinosaur and the banner sentiment with a little foam tape for added dimension.

 I finished the inside with an additional dinosaur and the leftover die cuts from the front. And I made the dinosaur stand on the remaining sentiment. Cute? Or... Rawr-some maybe?