Showing posts with label Unity Stamps. Show all posts

Monday, July 6, 2020

Growing In Unity Day 1 | Graduation card


Hi Everyone! I have the pleasure of sharing a few projects this week for Unity Stamp Co. They do this thing every week where someone else shares projects for the week and you know what they do? They give things away! Yep, free quality stamps. LIKE Completely FREE! To enter, you comment on this blog or my YouTube channel. The more posts you comment on the better your chances of winning the sweet prizes Unity offers.


The first project I'm sharing this week is a custom graduation card. The young man was adopted when he was young and now lives in the United States with his family. He recently graduated high school and I wanted to make his card really represent him. 


Unity stamps has so much to offer as far as selection. I'm a huge fan of this graduation stamp set and used it for this card. 


Here is a closer look at that globe! 

Video Tutorial


Stamps Used: 


Copic Markers:

Remember to comment for a chance to win some Unity Stamps!  
Thank you for stopping by and as I always say,
GIVE CARDS GENEROUSLY!

-Renee'

*******************Want to Connect*********************
Email: Delaneyjanecards@gmail.com
Instagram: http://www.instagram.com/delaneyjanecards/
Pinterest: http://www.pinterest.com/delaneyjanecards/
Facebook: http://www.facebook.com/delaneyjanecards
YouTube: https://www/youtube.com/c/delaneyjanecards
Looking to purchase a card I've made? Check out Delaney Jane Cards online shop at http://www.delaneyjanecards.com

Thursday, October 3, 2019

Paper Piecing and the Illusion of a Scene

I created an adorable paper pieced dress for this super sweet little girl. I wanted to show you don't always have to color in the scene to give the illusion of a scene. Sometimes the background papers and grounding the image will work the same.

This Unity Company Stamp is one of my favorites I own from them. I love that they are a family owned business sort of local to me.  I've had this image for a long time and I enjoy paper piecing her dress more than coloring it, and that is what I did for this card.

A little Copic coloring and some dies from my stash helped me create an adorable Halloween card.

You can watch this card come together on my YouTube channel here: Delaney Jane Cards

All items were purchased with my own funds. This video / blog is not sponsored.

Confused about why I named it all Delaney Jane Cards if my name is Renee’?
This entire thing, shop, YouTube channel, blog, etc, it is all named after our angel daughter who passed away in 2013. I made her some promises when she passed away. I would spread joy, I would make her proud and I would speak her name daily. This is one way we choose to honor her memory, and help me keep my promises.

Speaking of blog, you can check it out at : www.delaneyjanecards.blogspot.com
YouTube is at:  https://www.youtube.com/channel/UCyFZ3_vCTd3EohFMlGfRODQ
Check out our online store at: www.delaneyjanecards.com
Want to visit us on Instagram? Check us out at @delaneyjanecards
Facebook: https://www.facebook.com/delaneyjanecards/
Email: delaneyjanecards@gmail.com


Tuesday, September 3, 2019

Mirror Card Using Unity Stamps

Hello Crafty Friends!

Today I made some very encouraging cards using some Unity Stamp Company stamps. I've had these stamps for a while and to be honest, I'm a huge fan of Unity Stamp Co stamps. I always get a great image with their red rubber stamps.

Being a small business myself I absolutely love that I can support a small business when I purchase from Unity. Unity is located not far from me, about 4-5 hours away, in Minnesota. I've been purchasing their stamps for a very long time and have a fairly elaborate collection of the red rubber goodness they cook on-site to order!

Ok, well we are all here for the cards, so let's get right to it.


I've been trying to really encourage others lately. When I find myself in need of encouragement most, I try to encourage others as much as possible. I am a firm believer that what we put out into the world, we get back.

I wanted to remind women that when they look in the mirror they are not seeing the version of themselves that others see. We often pick and poke at ourselves in a way that is detrimental to our mental health.

I created scene cards where the woman was looking in the mirror. And the mirror is really a mirror.

I used Tonic Studios brushed silver cardstock. If you haven't checked out their papers yet, I'm sorry but your wallet will be mad!

I created the frame with a beautiful die from Spellbinders. It is actually a locket die but with a little trimming and a snip, it becomes a beautiful mirror frame.

Check out my video and see how these beauties came together!Delaney Jane Cards YouTube


Thanks for stopping by! -Renee'

Thursday, June 13, 2019

A Hero's Card


 A Hero's Card


Delaney Jane Cards was contacted by a dispatcher in Pasco County Florida because she was organizing some gifts of comfort for an officer who was injured in the line of duty. He was shot in the leg during a domestic violence call. The officer's femoral artery was cut and his fellow officers saved his life by applying a tourniquet to his leg to stop the bleeding. The officer was recovering after surgery when we were contacted. The dispatcher found a card in our store she really felt fit her needs but needed a card to be much larger and have additional space for 100+ department employees to sign as part of a get well gift.


I set out to create the listed card in a larger size and figure out how to add additional space for signatures and well wishes. The finished card size is 5" x 7" and we included a kraft envelope in the appropriate size.

I adore this Whimsy Stamp set because it has several images for Police and Fire cards.


The images were repeat stamped on the navy blue cardstock with Versafine onyx black ink and then heat embossed with clear embossing powder. I chose the four images the hat, badge, and two sizes of stars as well as the words Honor, Deputy and Police Officer.


A main image panel with the hat (peaked cap) and the single word HERO were stamped in the same Versafine onyx black ink and heat embossed in clear embossing powder. This panel was layered on black cardstock and then adhered to the right side of the card front panel. A simple card that we hope brings a lot of joy during this very scary time.


The back of the card is stamped with these three hashtag sentiment stamps which were custom made for Delaney Jane Cards by Unity Stamp Co.


The envelope flap was stamped with the definition of a Hero in a coordinating shade of blue. Normally, this sentiment is stamped inside this card design but being unsure of the quantity of sentiments which will be written inside,  I chose to add this to the envelope flap.


You can see here there are several pages of inside for signatures and well wishes.


Delaney Jane Cards was honored to donate this card. It was a small act of kindness we are very blessed to be able to perform.

You are encouraged to check out our store at  www.delaneyjanecards.com


Friday, July 7, 2017

With the Faith of a Child... and an announcement!


With the faith of a child my husband and I decided to bring Because of Delaney Jane Cards to the next step. While I wanted to write this blog post to highlight these three beautiful cards and their reason for being made, I wanted to share some personal information and announce something very special.

First, the cards...

Our church will be "graduating" three young people this Sunday from the Children's Church and into the general congregation. One of the teachers asked me to create three cards, one for each of the graduates. I wanted to create similar but different cards because they are similar but different in their personalities and their walk with God.

So, I created two boy versions and one girl version.


The papers are from a BO Bunny  6 x 6 paper pad and the stamp sets are Unity Stamp Co. Each image is Copic colored and then layered into different designs.


My husband took some great photos to show the layers in these cards. They aren't cheap or flimsy, they are quality cards with multiple layers and details.


I finished the inside of the cards as I almost always do with a piece of coordinating paper, leaving a place for a message.


These cards are incredibly important to myself, my husband and mark a huge milestone in the life of BODJ cards. They represent the last and final cards created before we make one HUGE CHANGE.

I've made cards for over a decade. My style and skill level has changed and I've gotten better with my craft, as you'd expect from a decade of practice. I've participated in craft shows, hosted a Facebook page and sent cards to hundreds of people including anonymous cards to many cancer patients.


I currently have a studio where I create beautiful cards, take photos, post them to this blog or to my Facebook page and then I place them in a card rack and hope someone either decides from a post they like it or I bring them to a local craft fair to hopefully sell them. THIS IS ABOUT TO CHANGE!


Over the last week or so my husband and I have been working very hard at something incredible. He has taken over 500 photos, much like the ones above and I've sat at my computer for countless hours in hopes that my hobby can become more than just a hobby.

So with the faith of a child, bright eyed and hopeful, we have decided to open an ETSY shop.

We've named it DelaneyJaneCards and have loaded the store with tons of goodies.

We've also decided to have a GRAND OPENING, this weekend!!!

While we are both nervous about jumping into an actual business we are really excited to see what we can do together, for our family.

We want to open with a huge bang and are offering a coupon code to our friends, family and followers. Coupon code GRANDOPENING will get you 10% off orders of $10.00 or more when you use it at checkout.

Please checkout my Etsy shop by clicking here ---> DelaneyJaneCards  or by typing or copy paste www.etsy.com/shop/DelaneyJaneCards into your browser

Remember, the coupon code is good all weekend. Share with your friends and family. Additional coupon codes will be available in the future.

Thank you and we really hope this is the best next step for these cards and our family.

-Renee'

Friday, June 30, 2017

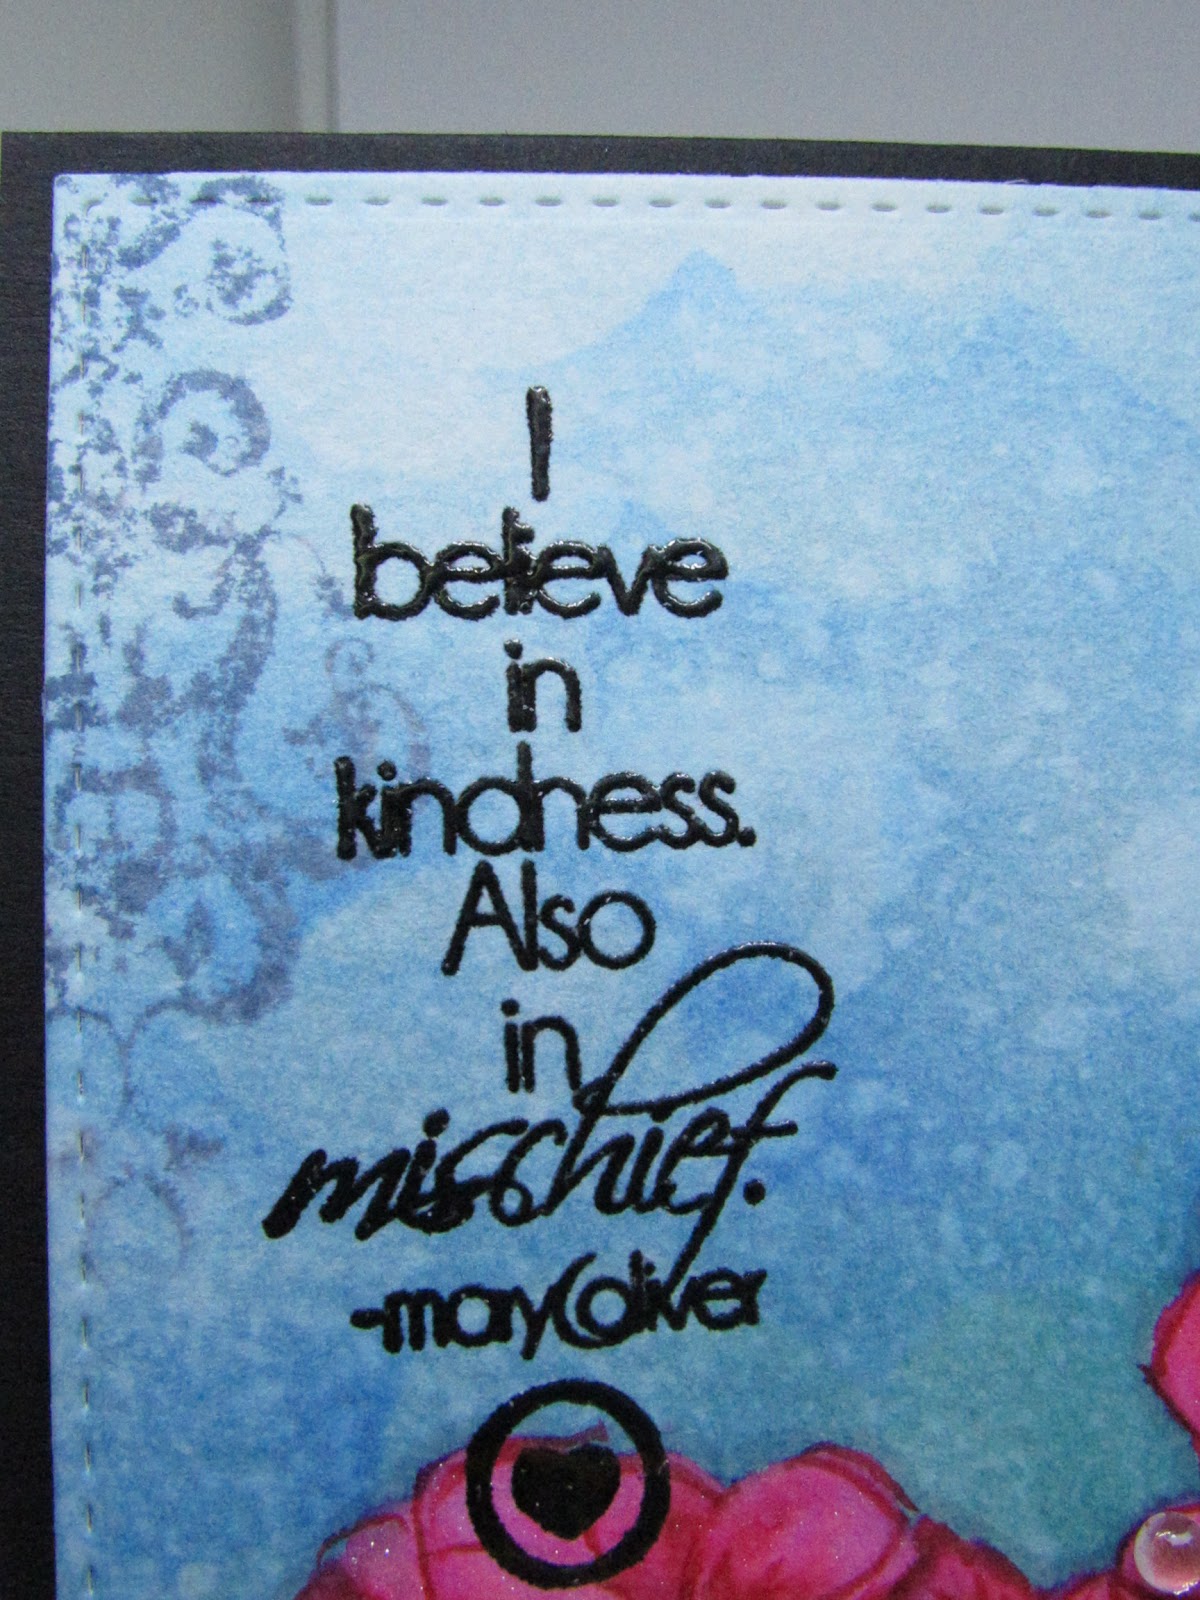
Quoting Mary Oliver


I played in the craft room today, again. And I liked what I created. This bright card was not what I intended on creating but once I started stamping and painting it sort of created itself. All the stamps I used are Unity stamps and I only used a single die from Simon Says Stamp.

I started by stamping my flowers in MFT Hybrid Ink, in the color natural. I was watching some YouTubers take a similar ink from SSS and create faux no line water coloring with it and I thought maybe I'd get a similar look with this. The answer... sort of a no... but I wanted to make this card work so I did a few things to help it along.

My images are stamped on Strathmore Ready Cut Watercolor paper. I masked my images and blended the background with a combination of several blue distress inks, broken china, mermaid lagoon and peacock feathers. Then I used a hand-cut stencil to sort of sponge in some cloud like shapes in the background. While the masks were in place I stamped the ornate shape in the background with stormy sky distress ink. Then I started to watercolor the images.


I used my Zig clean color real brush markers because, let's face it, I need serious practice with these markers. I used Carmine Red No 022 and Wine Red No 024 for the flowers. Just putting a little bit on the petals and pulling the color out with my water brush. I used Deep Green No. 044 for the stems. Once I had the base color to all the flowers down, I used my Distress sprayer to spritz the entire panel and get some cool distressed droplets.

After that, I went in with the Carmine Red Zig marker and added the outlines back into the flowers using a real light pressure, barely touching the paper. I wanted even more depth so I did use a few Copic Markers C1 & C3 to help create a little bit of a shadow so the flowers popped off the panel a bit more. This is very subtle but does help.

I die cut the panel with a Simon Says Stamp Stitched Shapes Bundle die for some additional interest.


I stamped the sentiment with my MISTI in Versafine Onyx Black ink and heat embossed it with Ranger Clear embossing powder. Then I sparkled it all up. I used the Wink of Stella on the flower petals that would be further back and in the shaded areas and I used the Spectrum Noir Clear Glitter Brush Pen on the areas where it would be out front. In real life, this card is so sparkly!

I added a few droplets from Pretty Pink Posh using my Ranger Multi Medium Matte. I lined the inside with a white panel because my card base is the black cardstock from MFT and that completed my card.


Sunday, April 23, 2017

Graduation and a Hop!


It is that time of year for me, again. Unity Blog Hop time!  I'm always so excited to join other crafters in these blog hops. They are fun and they expand my horizons as far as card style and stamping techniques.


I used Unity's  April Graduation Bundle  to create both these cards.


I figured with graduation season right around the corner it might be a good time to get a few cards made for my stash. 

I watched a Unity tip video a while back and saw one of the designers use Prisma Color Pencils on Vellum and I wanted to try that. The female graduate card is created using this technique. I only colored the cap and gown on this image and left he rest without color. When I layered it over this beautiful patterned paper by Pink Paislee (the Take me Away pack), I loved how the yellow stripe showed through the vellum creating a soft skin tone.  

The sentiment and image are heat embossed because this ink was taking a long time to dry and I wanted to move on, so a dusting of clear embossing powder over the black ink and a quick melt with the heat tool and I was able to move on. A few sequins from a Lucy's card mix (pastel paradise) and this card front was done. 


I finished the inside with a die cut panel, strip of patterned paper and an additional sentiment. 


The second card I created was a masculine version. I wanted to use the same colored pencils but this time used smooth white card stock to stamp and color my image on. I did use the same wonky stitched rectangle die from Gina Marie to cut the main panel that I used on the vellum from the previous card. 


The patterned paper is from a Paper House Color Ways pack. I die cut the sentiment panel with a SSS stitched banner die. I did more coloring on the image on this card than the previous. I added the pop of blue and yellow on a mono-chromatic card to draw the eye in. 

I finished the inside with a panel die cut with the same rectangle die and an additional sentiment. 


If you'd like to catch up on my Growing in Unity week you can start here: Unicorns and Rainbows GIU Day 1  from there you can visit the other 4 posts from my week.


Remember, this blog post is a part of a blog hop put on by Unity Stamp Company. Be sure to visit the links below for a chance to win!

You can find the other participants at the following blogs:


Wednesday, April 19, 2017

You've Captured My Heart

I love personalizing thank you cards, don't you? I have this wonderful, beautiful, talented friend who came to my house and took photos of our newborn, Ryker Gregory.


I mean, look at these, she is a new photographer and this is just a little sampling of the beautiful photos she took.


Look at these baby feet!


She even captured a little smile on this one and in the background is a teddy bear that has Delaney's hair in it. The bear was a gift from the funeral director when we buried her.

Anyway, back to the card. I needed to create a card that said thank you but I wanted it to be very personalized and I reached for a Unity Stamp called Captured My Heart by Lisa Arana.


There is really only a single stamped image used in this card, the camera. Otherwise it is completely created with die cuts, something I really don't do that often. The camera was just perfect with these patterned papers and I colored it to match. I used some Spectrum Noir Clear Sparkle Overlay Pen to cover the camera and then a little glossy accents on the lens. I added a few sequins, layered all the die cut panels and voila, a beautiful thank you card for a beautiful photographer and friend.

You can see the dimension in the image below.


I can't wait to send this to my friend.

Friday, April 7, 2017

Unity Stamp Company GIU Stamp Winners

I had the pleasure of being one of Unity Stamp Company's Growing In Unity Girls last week and was able to publish 5 blog posts, Monday through Friday, with a card or project featuring their stamps in each.

This also comes with the opportunity to draw two name and give away a package of 25 stamps to two lucky readers who commented on my blog posts.


So to recap, these were the cards featured last week...


These 5 blog posts left me with an astonishing number of comments (all of which I appreciated)....

I used Random.org to pick winners............


I love that little fox....they turned out sweet


I love this card! Haven't been a huge fan of this stamp set but you might be changing my mind!

Thanks Ladies! Please contact me via email with your mailing addresses: reneedyanne@gmail.com Please put Unity Winner in the subject line